Thursday, December 5, 2013

3rd Marking Period

                          Assignment 21 a-c


          In this assignment we started to use the program Google SketchUp. To start I made three shapes: A triangle, circle, and a square


              Now we learned how to use the push/pull tools to make the shapes from the previous assignment in 3d


        In here I used what i just learned to write my name in 3d.

                               Assignment 22


LxWxH=8x5x5
LxWxH=8x5x5

LxWxH=9x4x6


LxWxH=7x6x4

LxWxH=8x5x5

LxWxH=8x5x6

LxWxH=9x4x6

LxWxH=8x5x6

LxWxH=11x3x6

LxWxH=9x4x6

LxWxH=8x5x6

LxWxH=9x5x6

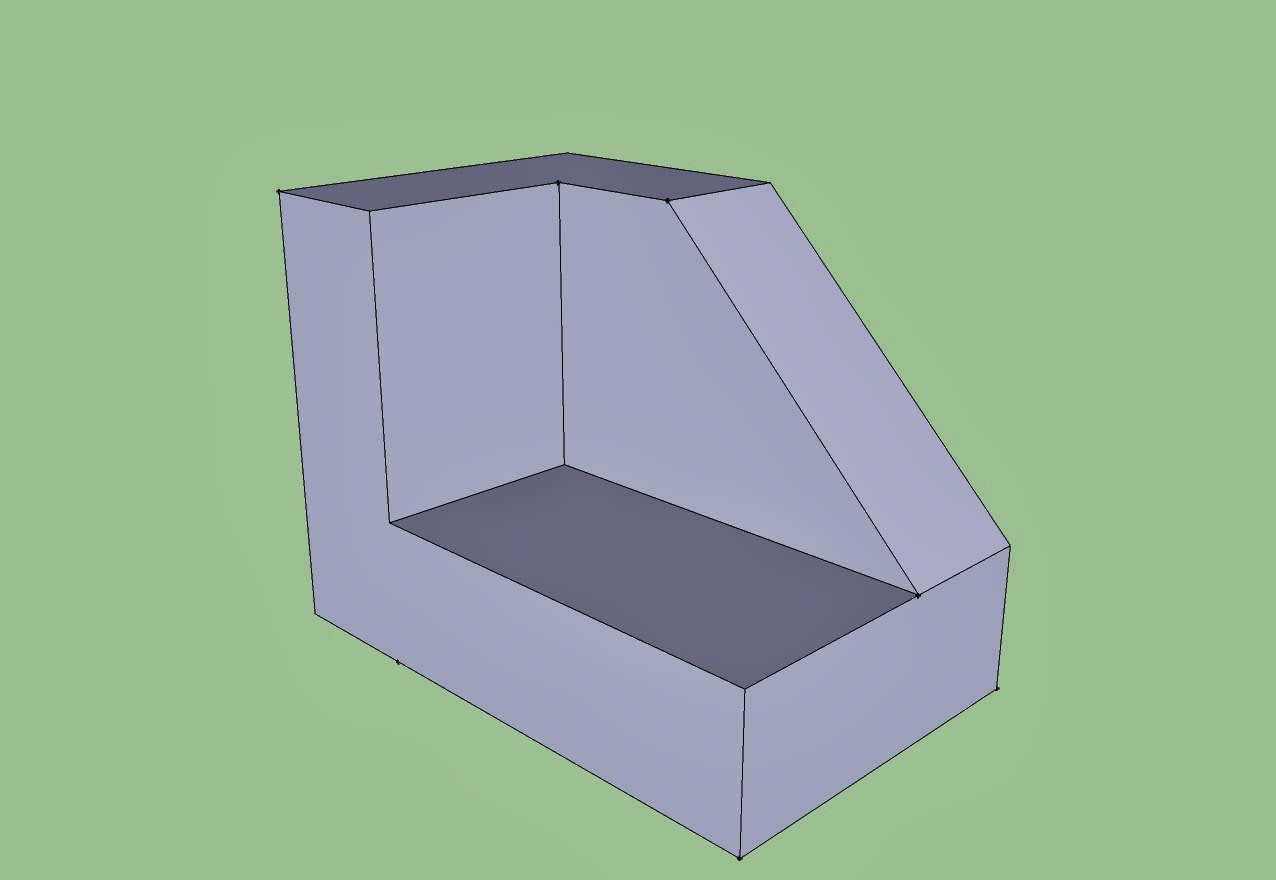
In these 12 blocks we were given  the dimensions of the shape we had to make. To start i made a square and pulled it out to make it 3d. Then i used the tape measurement to get the lengths of where i had to cut the shape off. Using the push and pull tool, I shaped the blocks into what they were supposed to look like.


                                        Quiz Block #5


         In this quiz i had to make a simple house. I started out like always with making a 3d square. I then made a slanted line through the roof so i could push it out and make a slanted roof. I finished this by making the entrance to the house.

                                           Assignment #23


                      In this assignment we had to make a gingerbread house based of a picture of a real one. Yet again, I made a 3d square and used the push and pull tool to make the house. Then I had add the details like the windows, door, candycanes, and door. I finished this assignment by coloring the house.


                                        Assignment #24


                     In here i had to use the gingerbread house I made previously and use Photoshop to make it 3d. First i picked a gingerbread themed background and placed my house in there. Then i copied the layer of the house and changed the color to only red and moved the image a bit to the left of the original house. When i finished, I used 3d glasses to see my house in 3d.


                                         Assignment #25


                    For this assignment i had to make a glowing animation of a power button. To start I used the ellipse tool to make the circular shape of the button. After making another smaller circle I gave it a gradient to make it appear like it does. After adding the power button and changing a few blending options, I put all my layers in a group and copied it. In the new group I changed the blending options of the power symbol. To finish this I turned on the animation window and copied the frames to make the animation appear to be glowing.


Quiz: What is GIF?

GIF stands for Graphics Interchange Format and it supports animations. It is good to use for simple images.

How does animation work?

Animation is when a picture moves from one frame to another and appears to make a short video. Animations can differ from simple images to cartoons.


                                         Assignment #26


        To start making the room I used the rectangle marquee tool to make a simple shape. I then used the rulers to make guidelines of were the walls and ceiling would be. I used the rectangle tool and followed the guide lines to make the walls, floor, ceiling and middle. I then changed the perspective of the ceiling and floor to make the room like this. To finish i changed the blending options to make the room look gray.

                                  Assignment #26 B


Friday, October 18, 2013

2nd Marking Period

              #11: Flyer redesigned by Carlos Tejeda

         To make this flyer i opened up Photoshop and used the gradient tool to make the background. Then i made the title of the flyer and changed the blending options to give it a glass effect. I searched through Google looking for pictures that relate to the program STEM that this flyer is advertising. After finding those two pictures i saved them and open them in Photoshop and finished the flyer by adding the information. 


                             #12 Texture Via Layers


  To make this I searched up a picture of a suit. After finding one i then looked for a texture i would use to put on a suit. Opening the picture of the suit in Photoshop, I used the magic wand tool to cut off the jacket of the suit and paste it in it's own layer. I then placed the texture over the suit and made a clipping mask so the suit shows through the texture. I finished by adjusting the opacity of the layer to make it look like it was part of the suit.


             #13 Change One Thing Poster by Carlos Tejeda

         The NYC FOOD BANK Logo was used solely for education purpose. 

No Copy Right Infringement was intended

           In this poster I made a solid purple background. Then I searched for a picture of a pizza box and a watermelon. Opening the pizza box in Photoshop, I used the magic wand tool to cut the pizza and paste in another layer. I then opened the watermelon and covered it over the pizza and created a clipping mask on the watermelon layer  to make it look like the watermelon is in a pizza box.  Lastly I researched the healthy benefits of watermelon to add on the poster. I finished this by adding the NYC Food Bank logo.                                                                                                                                             

                          #14  Jack O'Lantern by Carlos Tejeda


To do this assignment you need to get a picture of a pumpkin. Open the picture in Photoshop and use the magic wand tool to cut the pumpkin out of it's background. You can change the blending options to make the pumpkin have a outer glow. Then you use the pen tool to "carve" out the eyes, nose, and mouth of the pumpkin. To finish this you change the blending options of the things you carved to give it a glow to make it seem like a real Jack O'Lantern.

                     #15A Flag Displacement by Carlos Tejeda
In this assignment we used a picture of a flag of our choice and a brick wall. I opened both files in Photoshop and placed them in one file. I changed the blending mode of the pictures to hard light. I then made a copy of the brick wall and desaturated it. With the brick layer still selected I gave it a Gaussian blur. After I saved the file as the displacement to use later. On the flag layer I used the displace filter and put the file I just saved.
I finished this by changing the opacity of the layer to give it a more natural look.


                            #15B Face Displacement by Carlos Tejeda

In this assignment the process was the same as the previous one except instead of using a picture of a brick wall I used a picture of myself. As i used a Japanese flag only a part of my face is red while the area around the red circle is white.        

                          #16 Motion Blur with Smart Filters                   

           The picture above shows how I used Photoshop to change a picture of a dog to make look like he is running. I started this by opening the original photo as a smart object. I then applied a motion blur to the picture. Where it shows the layers, I clicked the mask thumbnail so I could edit the picture on what has the motion blur. The finished picture is of the dog in a blurry background that make it seems as if he was running.


                                #17 Quick Mask

In this assignment I used a picture of Dexter Holland and opened it in Photoshop.Then I used the quick mask tool to select an area to change. After I highlighted his left eye(it shows with a red color over his eye) I then inverted the selected area and changed it to the color I wanted.         

                                    #18  Soft Focus Effect


For this assignment we had to download a picture of a person in their last year. Then we opened it on Photoshop and changed the filter to smart filters. After that we changed the blur to gaussian blur and then we changed the radius slider to put the effect on the image. Then we used the brush tool to outline the eyes and mouth after we gad brightened the image. We outlined the eyes and mouth for it to stand out in the picture. We the changed the opacity for the effects to show.


                                #19 USB Drive by Carlos Tejeda


                         #20 Wireless Phone by Carlos Tejeda